 |
| Story Board Screen Grab |

This is Prezi, an online mind map programme thats allows you to plan and research in a creative way. I used this to create a mindmap of ideas, give a breif on the story line and show similar indie videos. I believe this was a really creative way of presenting our ideas rather than a convention hand drawn mind map. I used this in the research and planning stages of my media coursework.
To create our media products we had to use a number of technologies. Some of the programmes we used were final cut pro and photoshop that were crucial for editing our video and delveloping our digipak. Myself and emily were the main ones to edit our music video purely because we had had the most experience on final cut when we edited our animatic. Below is a short video I created on the programme 'jing' on to show how the music video was edited. I only captured a short section of our video being edited however it shows a number of different techiques that we used. Firstly I had to import our video files and audio into Final Cut. Once imported all files went into one space where we could access them easily. To place the audio into the video I dragged it into the time line of Final Cut, I then locked this so that the audio did not move when we placed other videos into Final Cut. For the first scene of our video we had to place a warning of flashing lights which I placed into the video similarly to the audio but on a different level. As shown I began to put the rest of the images into the video. We only needed a small section of some of the film and so to cut it down I dragged it into the end screen where you can set the in and our points. I then dragged this into the timeline. This was a really efficent and quick way of cutting the scenes to what was needed. I then did the same techique to produce the next section of the music video. Once two clips were placed into the time line I added in a cross dissolve which can be found in the effects tab; this made both images flow together nicely. In our music video we used a number of overlays and so next I demonstrated how to create an overlay. Firstly we found the section of film we wanted to use again by using the in and out points. Next I dragged it into the time line on a different layer. At the bottom of the screen there is a button that has a black line on it; this is used to create an overlay. We clicked this button where it allowed me to change the opacity of each image. I adjusted both images opacity so that they both could be seen at the same time. I then played with this so that the overlay could be seen. Although this is only a small section of the music video we demonstrated all the techiques we used to create our final music video.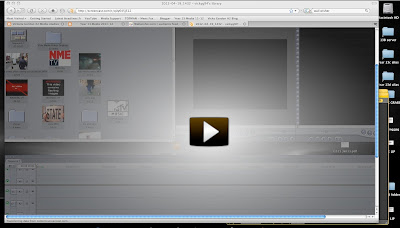 |
| Please click to access video |
The music video was not the only part of our media coursework; we also had to create a digipak. From screen grabs in other posts on construction of our digipak you could see the progress of our ancillary task however you could not see exactly how we created it. Sophie was mainly responsible for creating the digipak however the rest of the group did help in the creation of this for example myself and Emily created the magazine advert and the darker digipak to speed up the process of getting this done. Here Sophie made a similar video on the construction of our digipak in which Photoshop was used. Firstly she demonstrates how we constructed the inside page of our album. We already had the images in place which we did by screen grabbing our video and changing the brightness of the images. These pictures were placed one ontop of the other to create three images in a line. The colour pick tool was used to pick a colour out of Jakes hair for the background colour. In the video Sophie demonstrates how we created the paint splat effect. This was actually a font we found on 'Dafont', the size of the font was increased and rotated to fit across the page. Next was the back page where again screen grabbed images were already in place from our video and transformed it to fit the page. Sophie shows how we changed the contrast and exposures of the image to create a professional photo and also touched it up using the spot healing tool. Next was the front page where the same effects were used to make the image look more professional. We then added the text onto the album cover using the font 'code bold'. Jing could only hold 5 minutes worth of footage and it takes a lot longer than this to edit a whole digipak. After this we used a gradient tool and coloured it black to create a strip down the side which can be found on all CD's.
 |
| Please click to access video |

For the creation of the magazine advert the programme Photoshop was also used. When looking at magazine adverts I tried to look at the conventions of real media products to make our magazine advert look professional and realistic. In order to keep a link between all three platforms I decided to take screen grabs from our music video chorus. I took each image and transformed it so that it decreased in size. I then placed each image next to each other to create our final magazine advert. I did this for about half a page and coloured the other half in black using the paint bucket tool and ensuring the pictured layers when on top so they would show up. Using the text we had already found I placed this where the pictures and the black background met and added other features such as rating, reviews, promotional text and business icons.
Throughout my media coursework I have had to use a number of media technologies in the construction and research, planning and evaluation stages of my coursework.
To make our music video we first needed access to a camera, storage space and a tripod. At first we were going to use camera provided by the school, however because we were filming at night time we were told they did not pick up images very well in the dark. We managed to get hold of a Canon HD e03od camera which required us to use SD memory cards. We found when filming memory was used up very quickly and when we went back to edit our film in final cut we had to render everything when we moved anything. Obviously this was very time consuming and once we finished our rough cut the feedback we got was to change the story line. After planning another story line we decided this time to use the schools video camera instead as we were filming in day light now. This much more easier as we had a tape provided which allowed us to film a large amount of footage all on one tape. As well as this we found that when placed into final cut we did not need to render it every time and so editing our final cut was much much quicker! Due to the fact it was much quicker we could spend much more time on finer details such as the image quality, adding over lays and different transitions. With the video camera we used a tripod to capture still images and create a professional video. We also used my iPhone which had a strobe light app on it in which we used to create our chorus. To edit and complete most of our coursework we used Apple Macs, the big high grafic screen allowed us to add intricate detail to our music video and our digipak.
Programmes we used: Final Cut, Photoshop and MPEG streamclip

 |
| Final Cut Screen Grab |

 |
| Layers |

MPEG streamclip was a programme we used to export of media videos from final cut. First we had to export it as a quick time movie. Once this was done we then had to drag the file into MPEG streamclip where we saved it as an MP4 file which allowed us to upload onto blogger.

Blogger is used to upload all of our media coursework. All our research pictures and final peices went on here in individual posts. I felt this was a creative way of presenting coursework that allowed us to use many media technologies.
Websites used for research: Google, Wikipedia, music websites (MTV, NME) and You Tube.
All the above websites were useful for providing important information about our genre of music and helped with some of the elements you see in our media coursework today.
 |
| you tube research |
 |
| google research |
 |
| Wiki research |

This is slide share, it allowed me to create a word document and place in on my blog. I found this gave a slightly different effect to normal posts and allowed me to add pictures much more easily with different borders. I used this in the research and planning stages of my media coursework.

This is Bubbl.us it is an online mind map programme. I used this to create a mind map of my Indie target audience. I found this useful as it gave me an insight into the genre in which we had chosen.

This is Go Animate, it is an online programme that allows you to create your own cartoon. I used this to respresent my target audience. I got the two charaters to say things about the indie genre. I felt this was a good way of representing the indie genre as it was different than just reading what they did. The only problem with this programme as the character choices and scenes were limited and so I picked the ones I felt were most appropriate for the indie genre. I used this in researching the target audience and also in my evaluation question 3.

This is a html code I used to chang the way I presented my text in evaluation question 2. I thought it was make a change to the conventional text in a blog and felt it was a nice way of presenting text. I have also used scroll bars in other posts for example presenting the lyrics of our chosen song. It allows you to put a large amount of text in a small space. I also used HTML coding when we were discussing song choices. I made a drop down list of the potential songs where you can click on each song and it will take you to the music video. I felt this was a very technical way of showing our music video choices.


Here is a screen grab of a video I made for evaluation question 1. I made this video in final cut and really felt it presented my technical ability in this programme. I first researched songs that I felt closely respresented some of the scenes seen in our music video; this song was Ellie Gouldings 'lights'. I placed this into final cut and set in and our points of the section I wanted to use. I then decreased the volume of the song and did a voice over, where I spoke about the lighting in the music video. To compare it to our own video I took a section from our chorus (where strobe lighting was used) and again did a voice over comparing it to our own music video. I found that this was a really creative way of presenting an evaluation question. I also used the same technique for the camera angles and lip syncin in evaluation question 1 however I did not use a voice over and added text instead.


In evaluation question 3 (audience feedback) I used a number of media technologies to represent it. Firstly we placed our music video on Facebook where we recieved feedback via a social networking site showing the use of internet here. We also recieved written feedback which I placed onto an online programme called Wall Wisher. As you can see this programme allowed me to create a wall affect where I typed up all the written feedback we recieved making it easily readable. We also decided to capture verbal feedback and made a video of this. We recoreded five people on my iphone and asked them questions on our music video. I made this in the same way as the other videos in final cut were we also added our song as background noise and overlays when our respondents gave examples. As a group we felt this was a really good way of presenting our feedback and was something we could all work together on as a group.

For all my other digipak posts I just wrote about them and posted pictures so for the album construction I decided to create a powerpoint which I uploaded on authorSTREAM. I could place pictues on here and write text next to it, it really made it easy to compare our two digipaks with real media platforms on this type of presentational device.

To introduce my first evaluation question I used Voki, which is allows you to create an animated person who speaks. I created a paragraph and typed it into the programme. It was a nice introduction and example of the many media technologies to come in my evaluation questions.
What would we do if we did not have access to the equipment we used?
It would be extremely difficult to create a music video without the help of media technologies. Without the camera we could not capture the footage we needed to and with out the computer we could not have uploaded it or researched into music videos to the extent that we have done. As well as this we would not have been able to have used programmes such as Final cut and Photoshop to edit our video and create our ancillary task. Therefore it would have been impossible for us to create the music video that we have made without access to the equipment we used.


